Project setup

Set up a project, from its details to inviting the team.
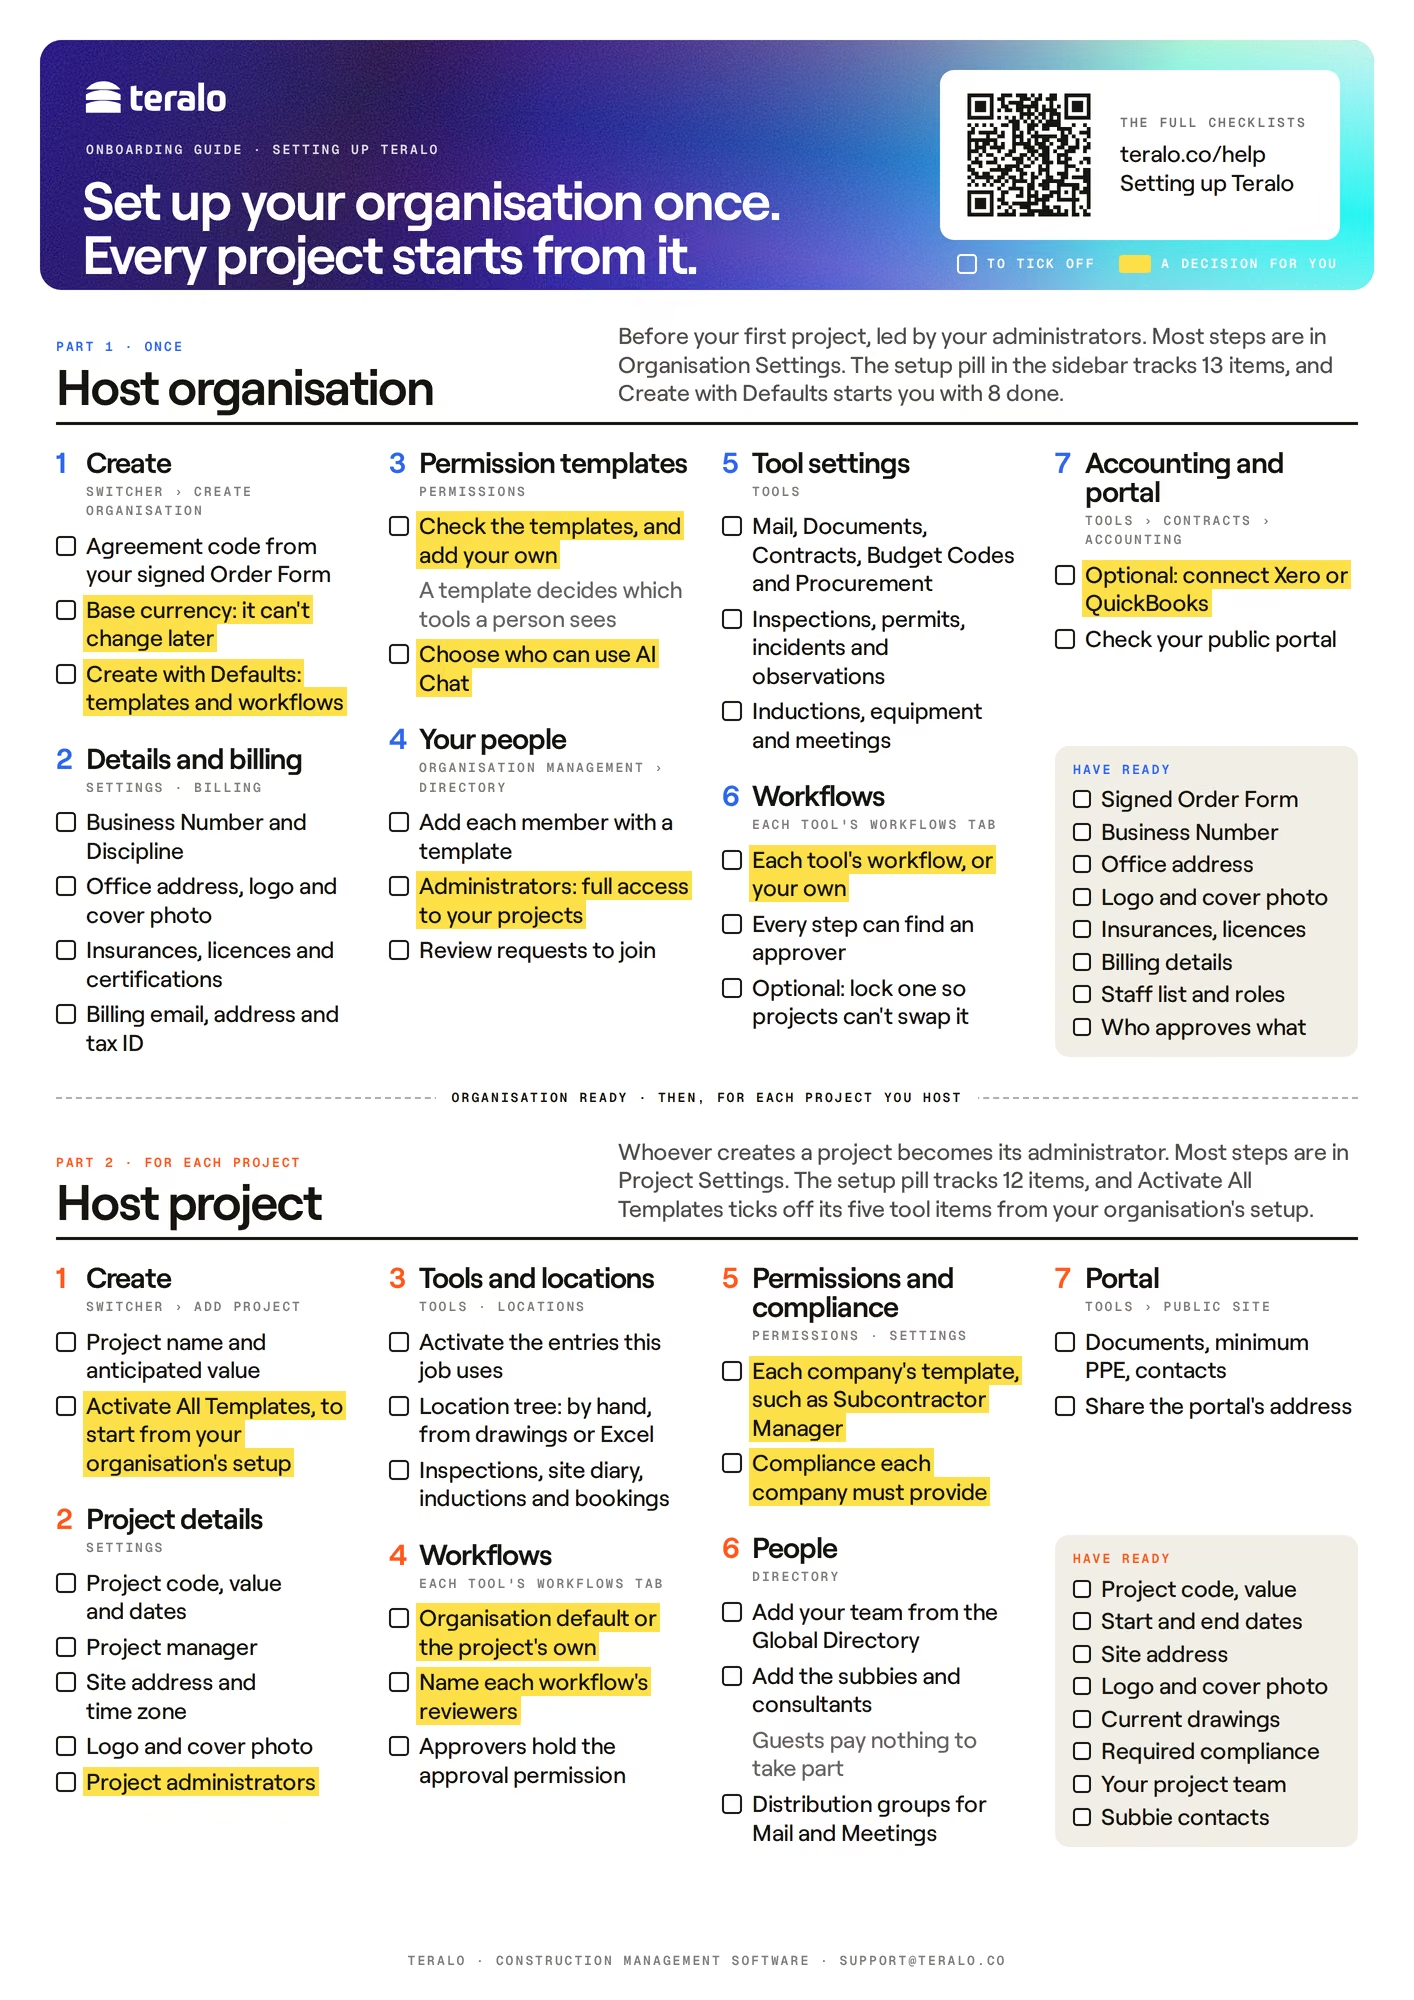
The onboarding checklist on one A4 page. Part 1, the host organisation, done once before the first project: create it with the Agreement code, choose the base currency and Create with Defaults; fill in the details and billing; check the permission templates; add your people and administrators; set up the tools; check the approval workflows; and optionally connect Xero or QuickBooks. Part 2, for each project the organisation hosts: create it with Activate All Templates; fill in the project details; activate the tools and build the location tree; choose the workflows and their reviewers; set the permission templates and compliance requirements; add the team, subcontractors and consultants; and set up the project portal. The decisions to make are highlighted, each part lists what to have ready, and a QR code links to Setting up Teralo.
View at full size

This onboarding checklist sets up a project your organisation hosts: its details, administrators, tools, approval workflows and permission templates, then the people and companies working on it. Each item says where it is in Teralo, and links to the article with the steps. The ticks you make here are saved in this browser only. This checklist and the host organisation setup checklist are also on one A4 page, in the printable onboarding checklist.

A project administrator has every permission on the project, and the person who creates a project becomes one. Work through the organisation's own setup first. Learn more about host organisation setup.
Create the project

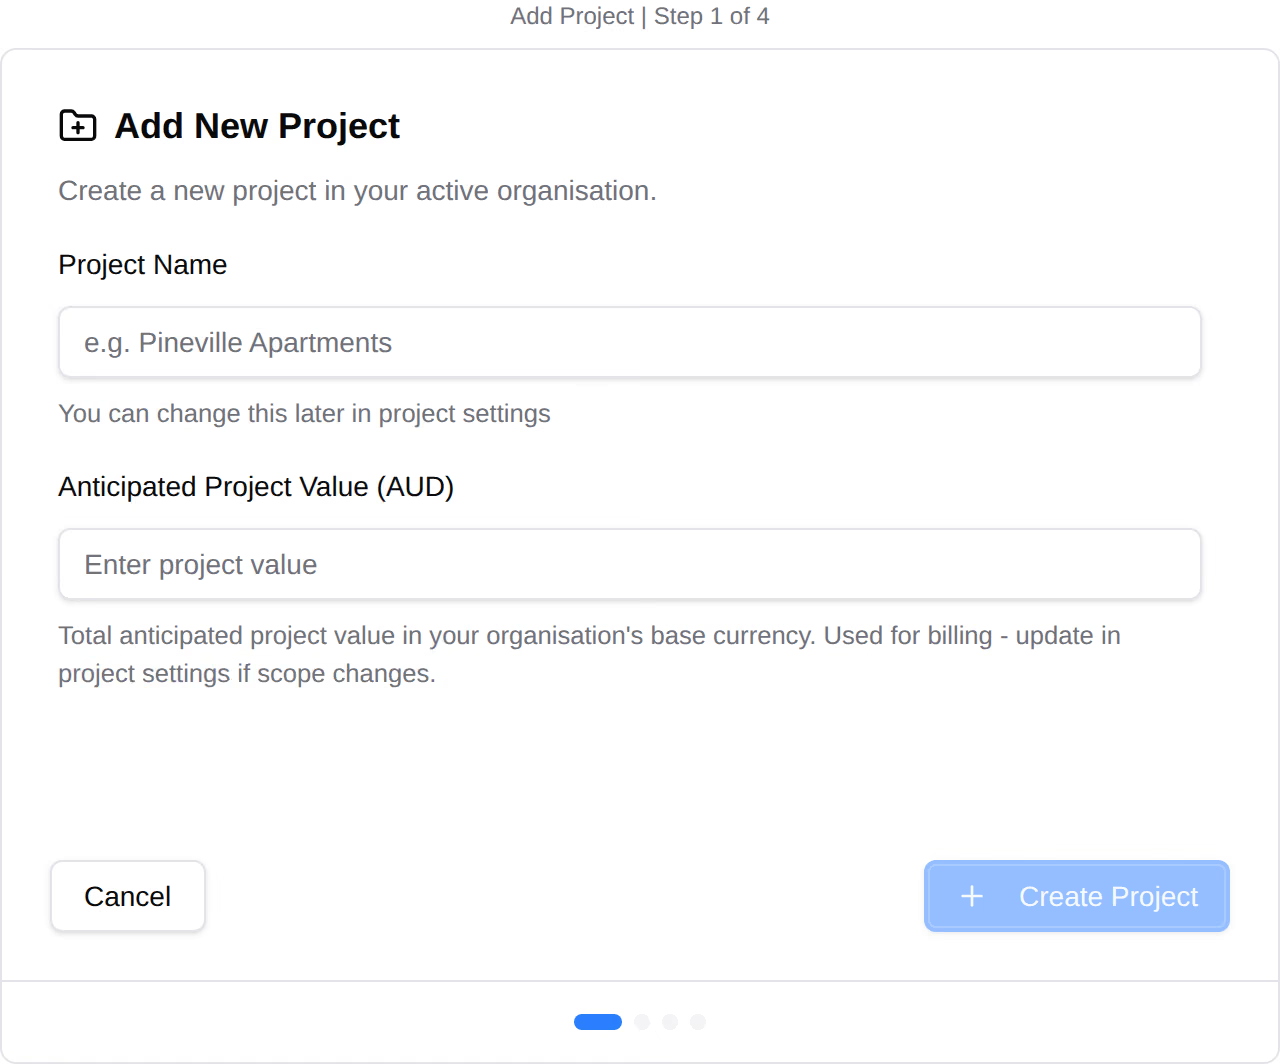
The first step of Add New Project, asking for the project name and the anticipated project value.
View at full size
The first step of Add New Project, with the name and anticipated value still to enter.

Creating a project needs a host organisation, and Can create new projects (host organisations only) unless you're an administrator. Learn more about creating a project.

Activate All Templates switches on the organisation's types, statuses, categories and cost codes for the project. It copies the organisation's project permission templates, inspection templates and workflow templates, without their reviewers. It also sets up the inductions, bookings, public portal and program calendar settings. Skip for now switches on only the inspection categories. Either way, you can switch entries on later in each tool's settings with Activate All.

Fill in the project details

In the project sidebar, under Project Settings, select Settings.
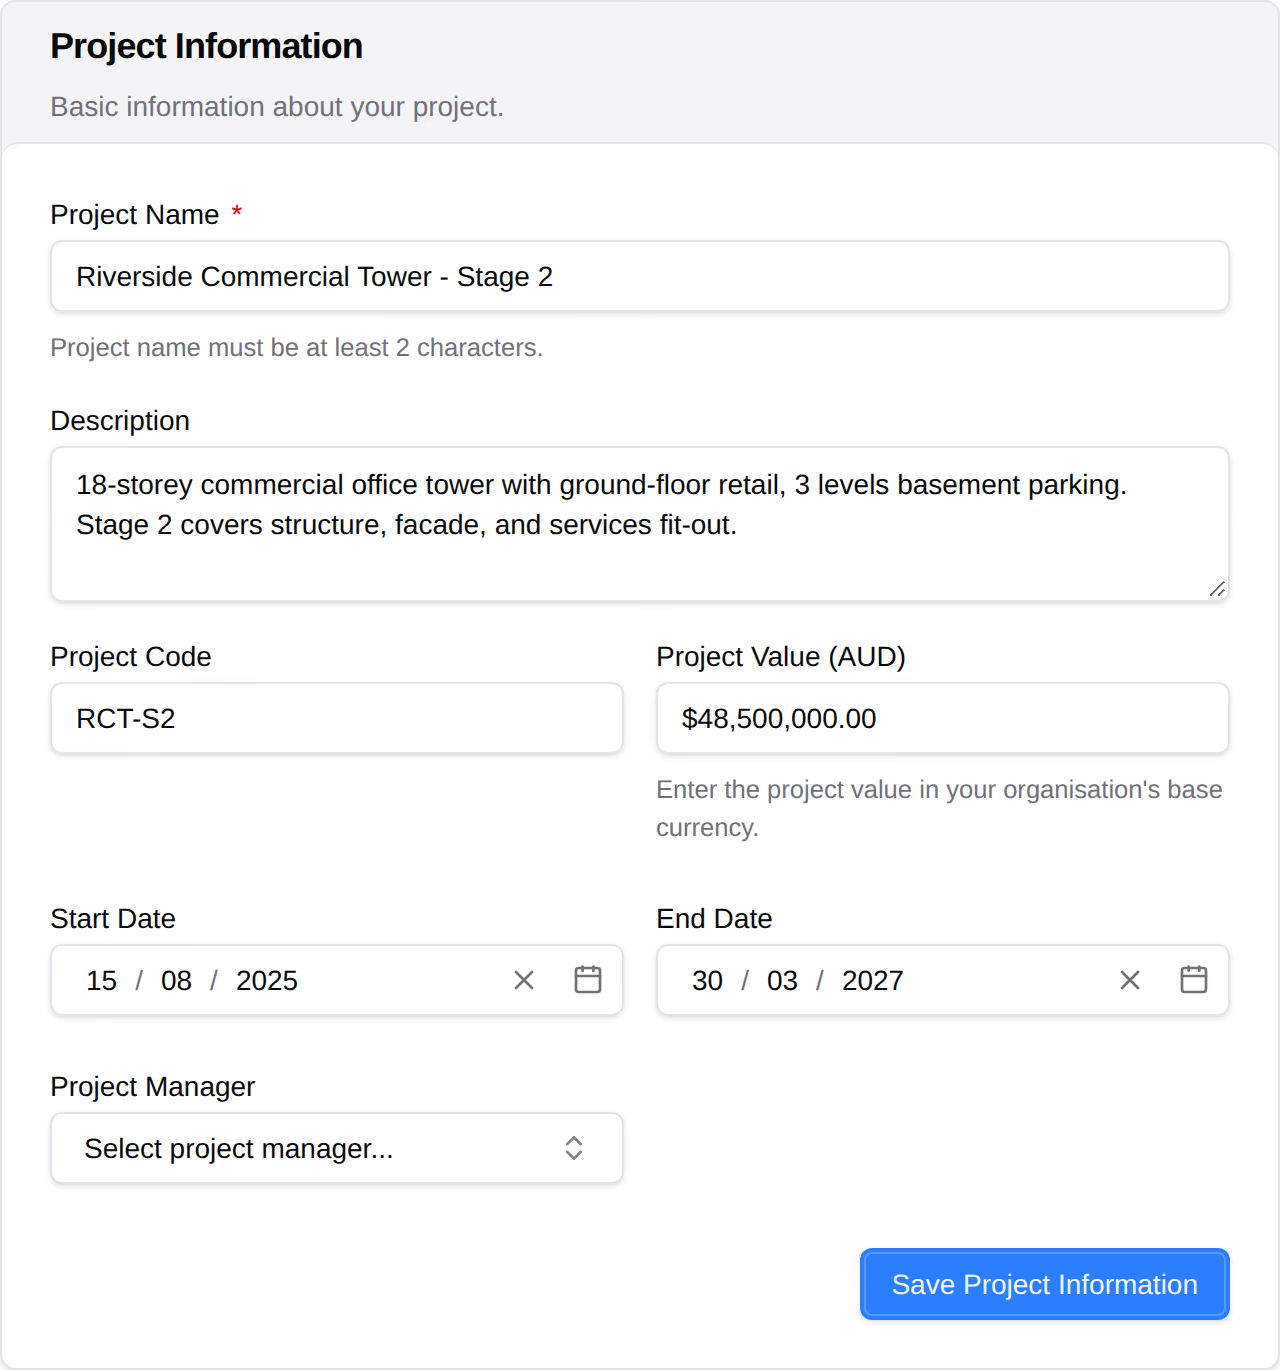
The Project Information card: project name, description, project code, project value, start and end dates, and the project manager.
View at full size
The Project Information card, with the code, value and dates set and no project manager chosen.
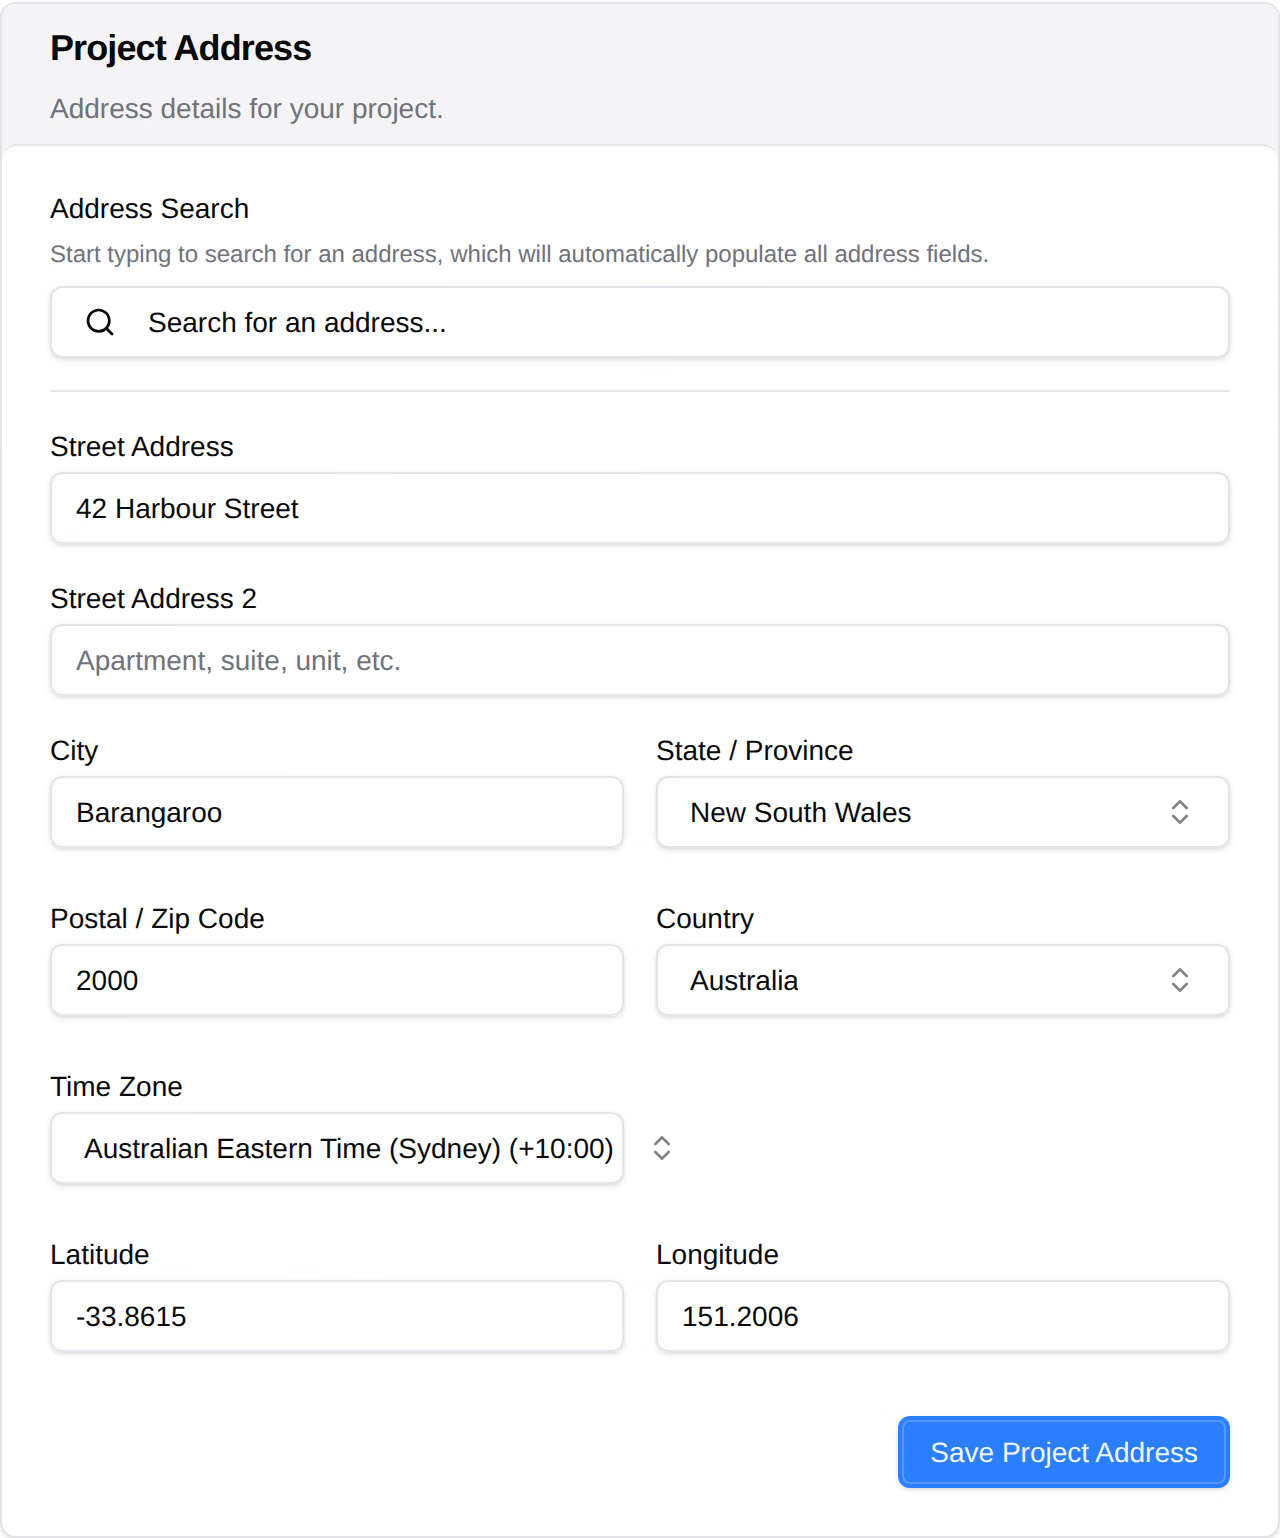
The Project Address card: an address search, then the site street, city, state, postcode and country, the time zone, and the latitude and longitude.
View at full size
The Project Address card, with the site address, its time zone and its coordinates.

Learn more about project settings.
Add the project administrators

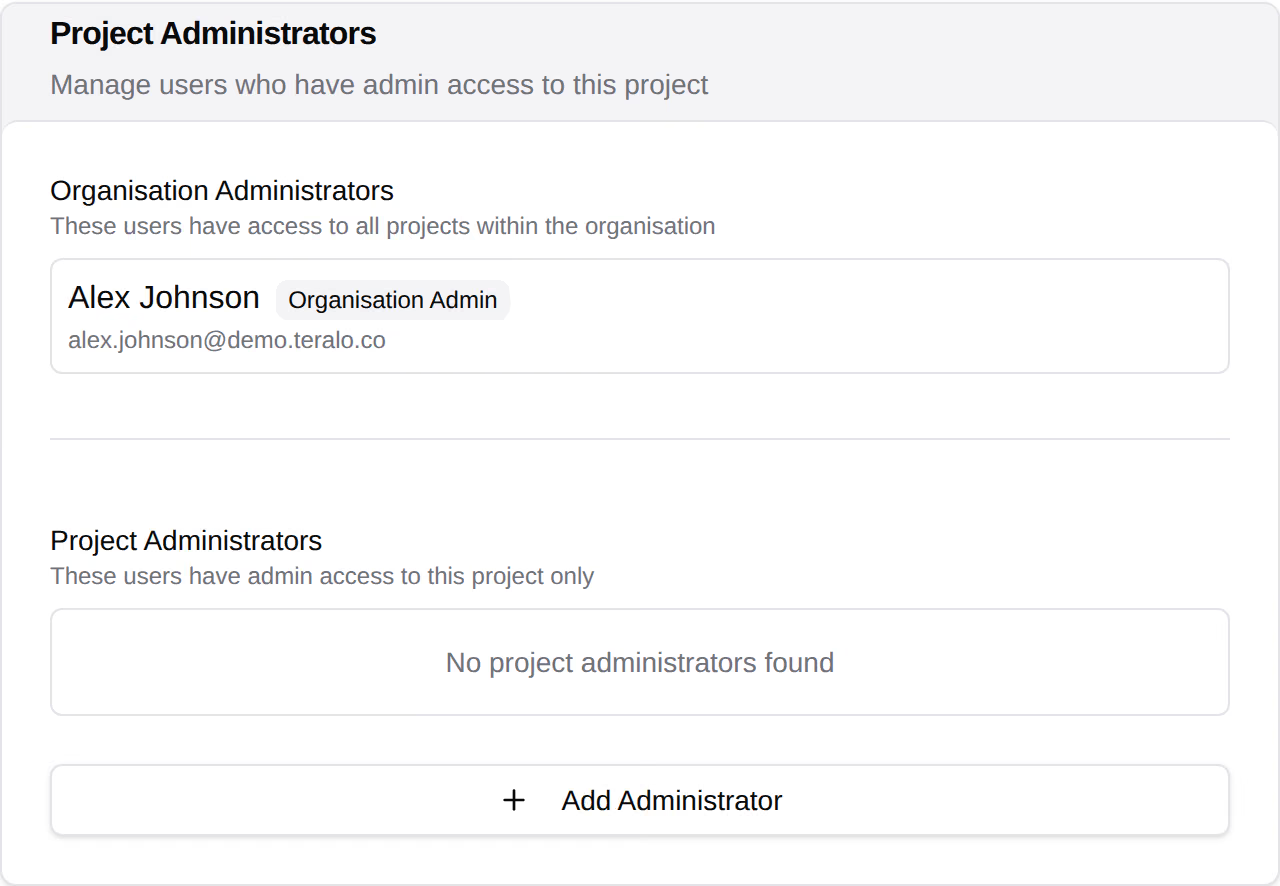
The Project Administrators card, with the organisation administrator listed above an empty project administrators list and the Add Administrator button.
View at full size
The Project Administrators card, with the organisation administrator and no project administrators yet.

A project administrator must be an active member of the host organisation. The host organisation's administrators already have the same access, and don't need adding.

Set up the tools

In the project sidebar, under Project Settings, select Tools. On each tool's settings, turn on Activate beside the organisation entries the project uses, or add entries for this project only. Learn more about the tools catalogue.
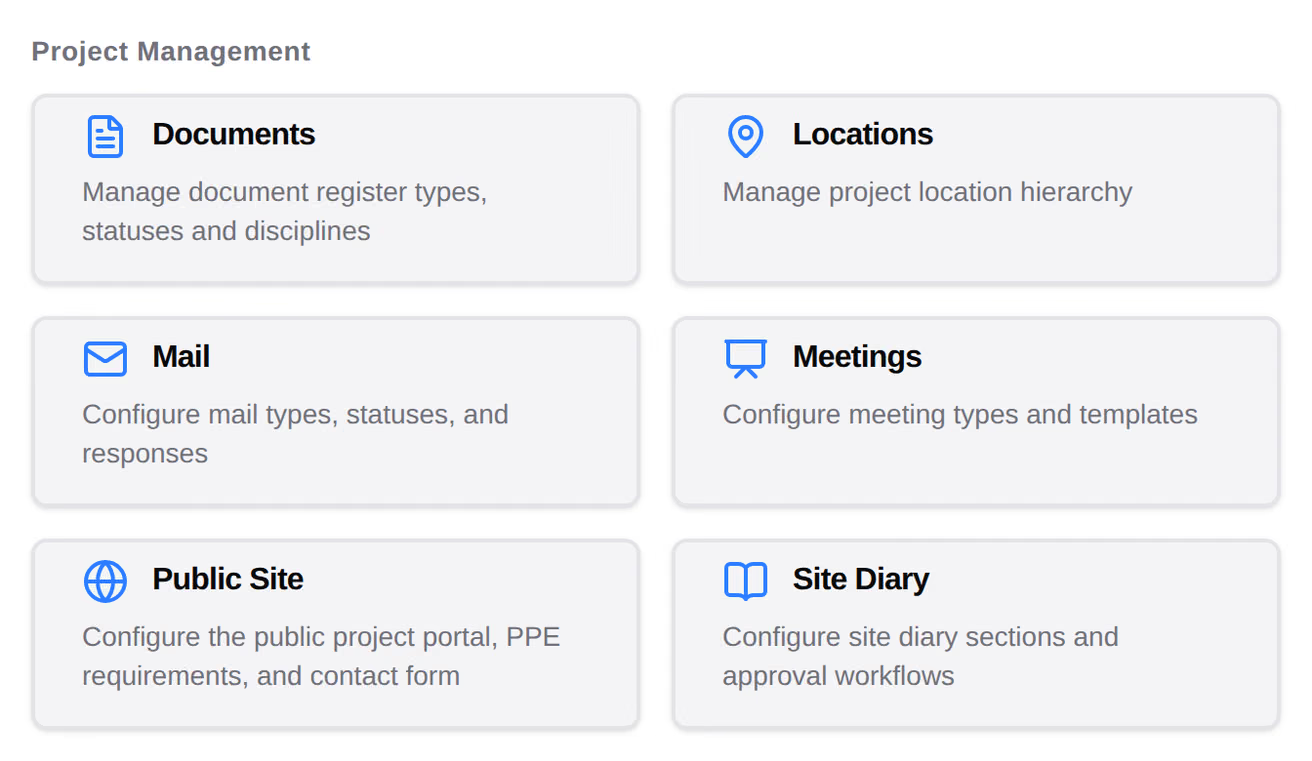
The Project Management group of the project Tool Settings, a card per tool naming what its settings cover.
View at full size
The Project Management tools on a project's Tools, a card for each.

The five tools the setup pill tracks

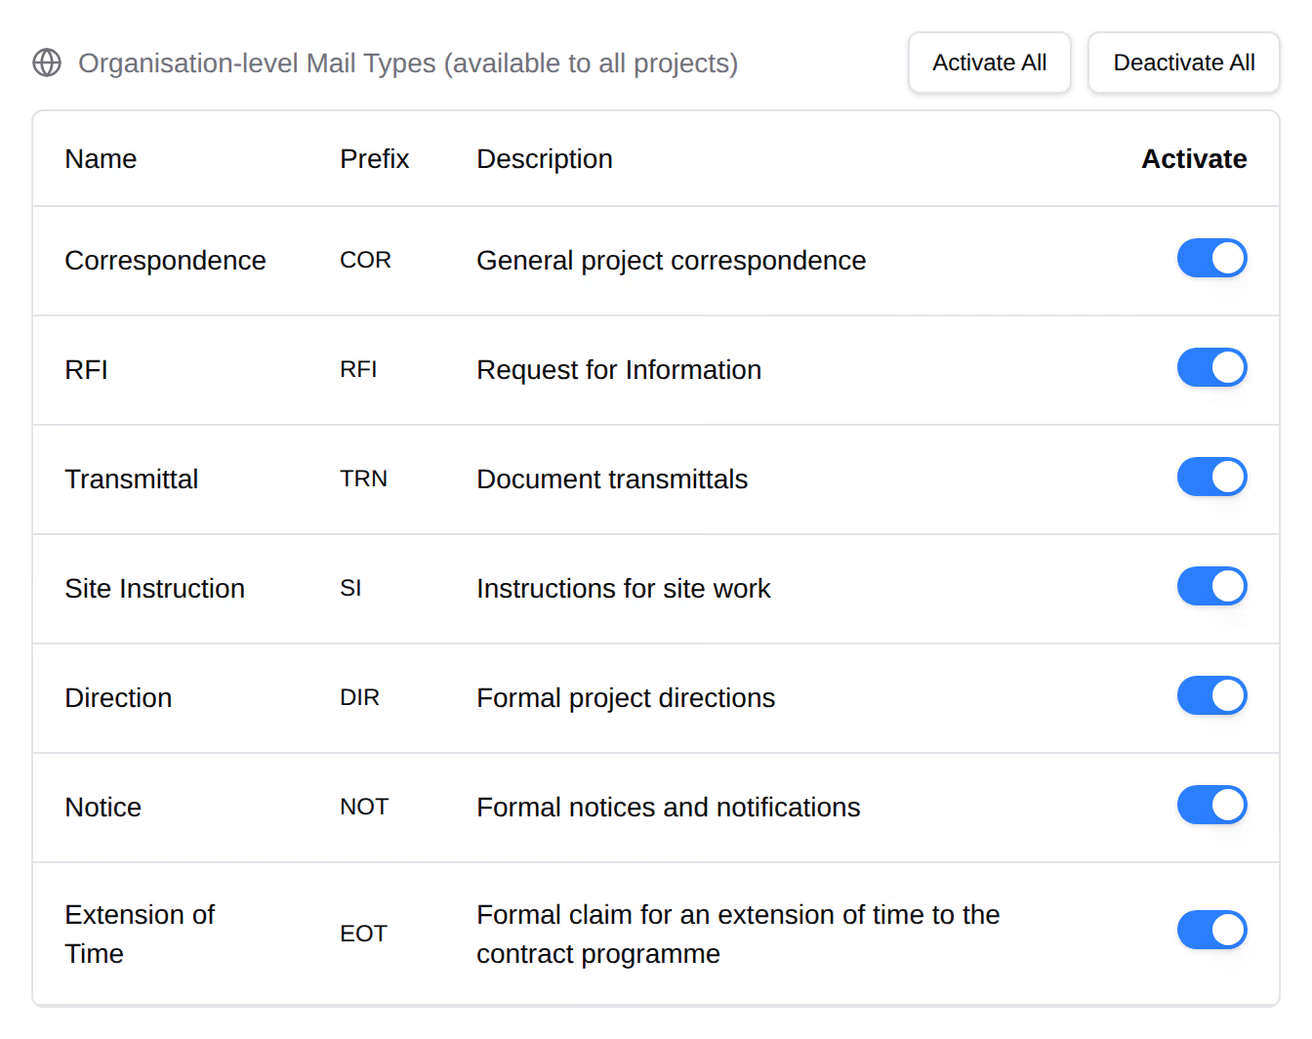
The project's Mail Types settings, listing the organisation's mail types with an Activate switch on each and Activate All above them.
View at full size
A project's Mail Types settings, with every organisation mail type activated.

Until a project has mail types and statuses, Mail shows Mail Settings Required in place of a new mail item, with Activate for Project or Create Defaults. Documents, Contracts and Procurement do the same.
Locations

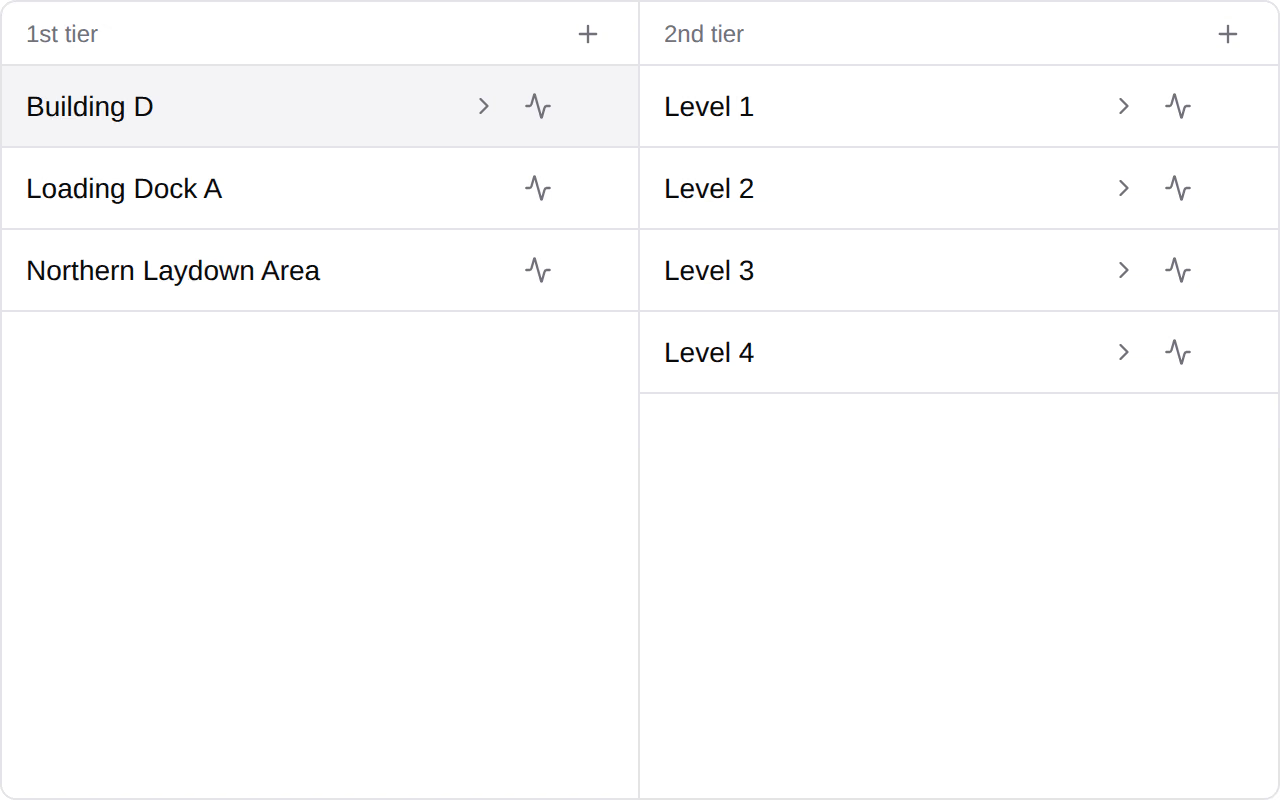
The project's location tree, a column per tier, with Building D selected in the first and its four levels in the second.
View at full size
A location tree with Building D selected, and its levels in the next tier.

Inspections, bookable locations, permit work areas and observations use the location tree. The inspections article has the steps.

Quality and safety tools

Site and resource tools

Choose the approval workflows

Each tool that uses a workflow has a Workflows tab in its settings.
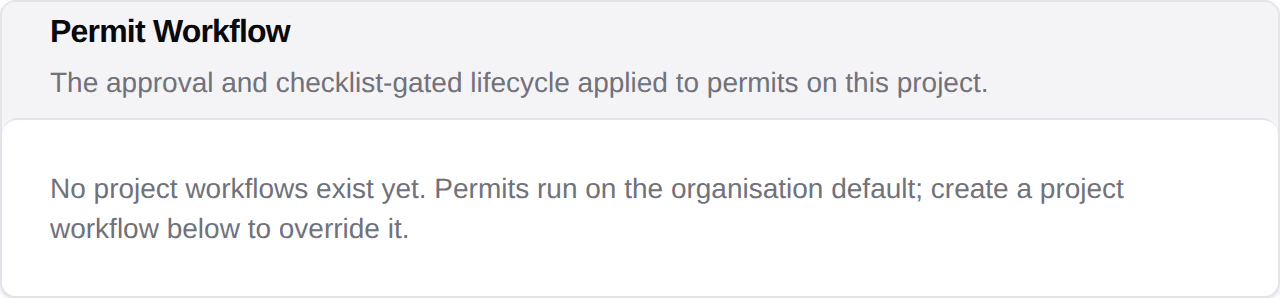
The Permit Workflow card on a project's Permits settings, reading that no project workflow exists yet, so permits run on the organisation default.
View at full size
A project with no permit workflow of its own, so its permits run on the organisation default.

Activate All Templates makes a project copy of each organisation workflow template. Without it, turn the template on under Organisation Workflow Templates, then create a project copy. A record can't be submitted until its tool, type or contract has a workflow, and a contract's workflows are chosen on the contract's own Settings tab. Learn more about binding a workflow to a tool.

Check the permission templates

In the project sidebar, under Project Settings, select Permissions.
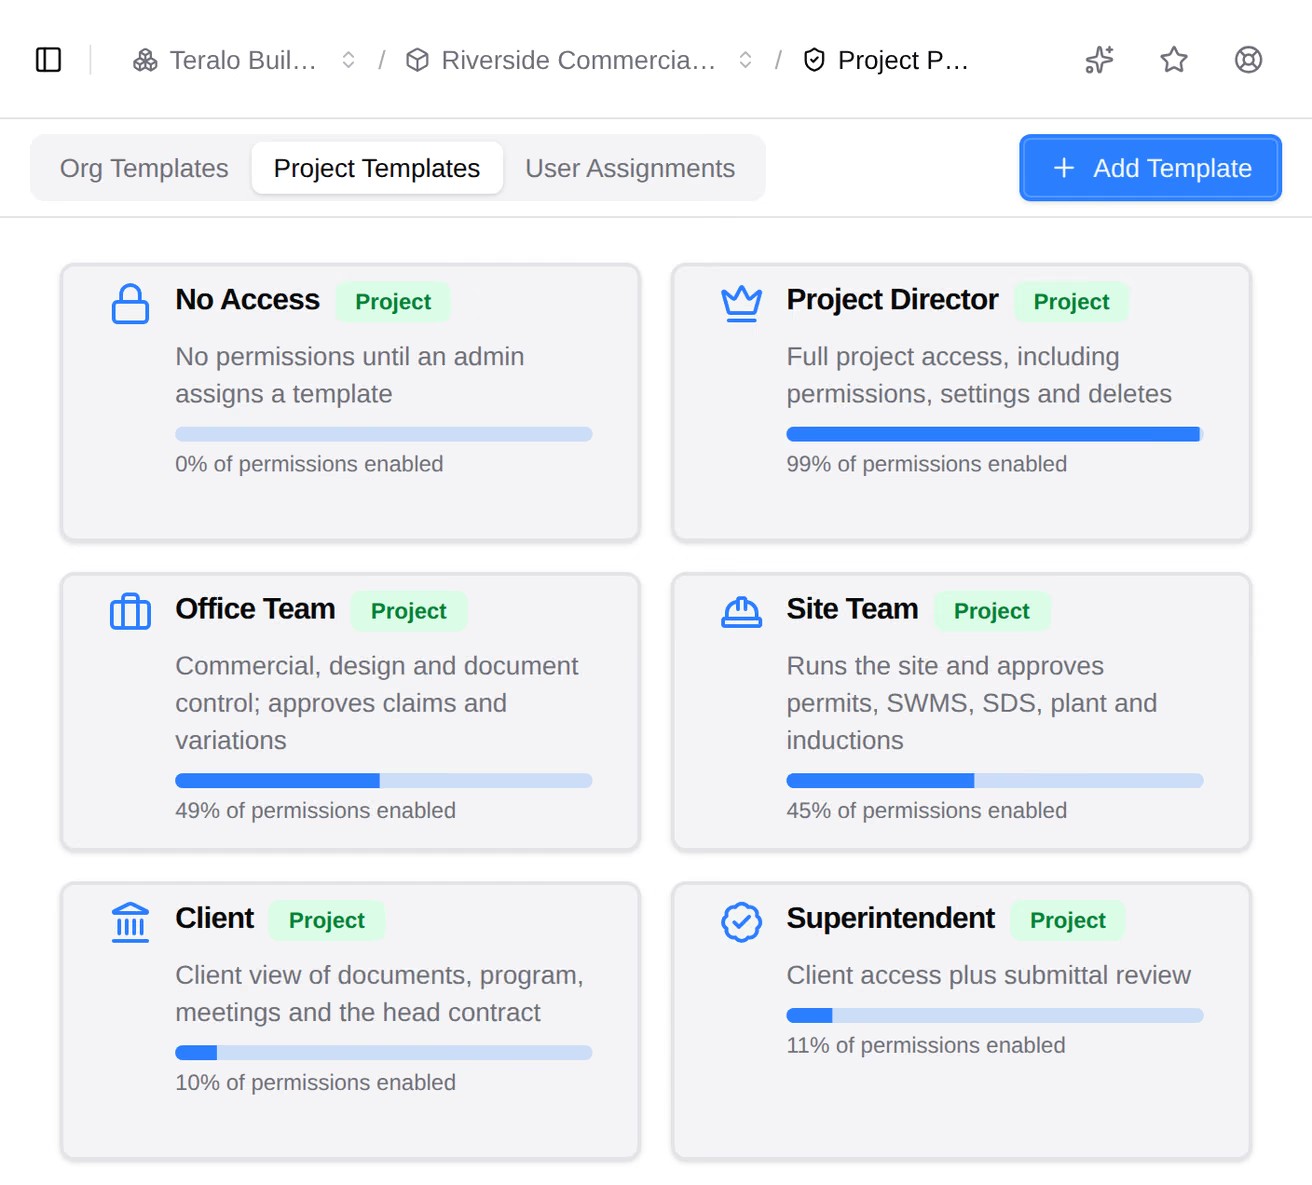
The Project Templates tab of a project's Permissions, a card per template copied from the organisation, saying what it is for and what share of permissions it gives.
View at full size
A project's Project Templates tab, with the copies Activate All Templates makes of the organisation's templates.

Org Templates shows the organisation's own templates, read-only. Add Template on this page creates an organisation template too, which every project is offered. Learn more about permission templates.
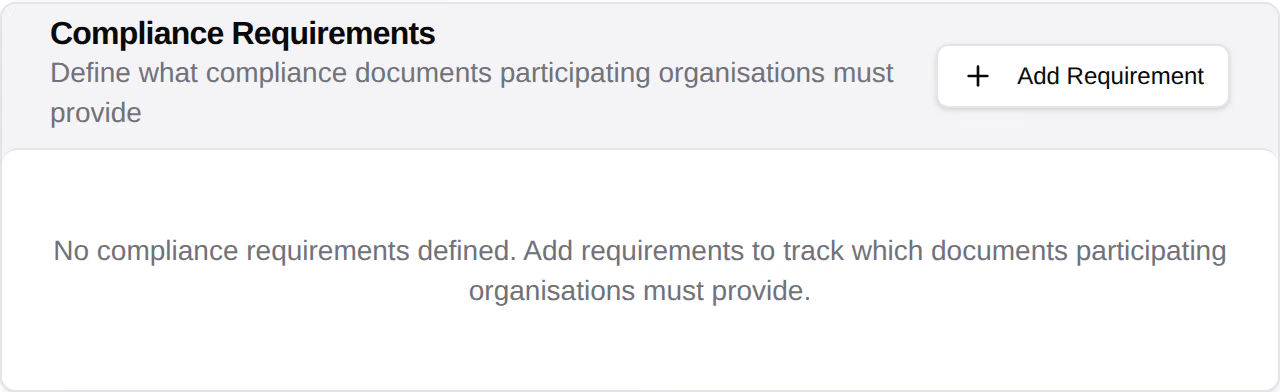
Set the compliance requirements

The Compliance Requirements card, with no requirements defined yet and an Add Requirement button.
View at full size
The Compliance Requirements card before any requirement is added.

Learn more about compliance documents.

Add your team

In the project sidebar, select Directory.
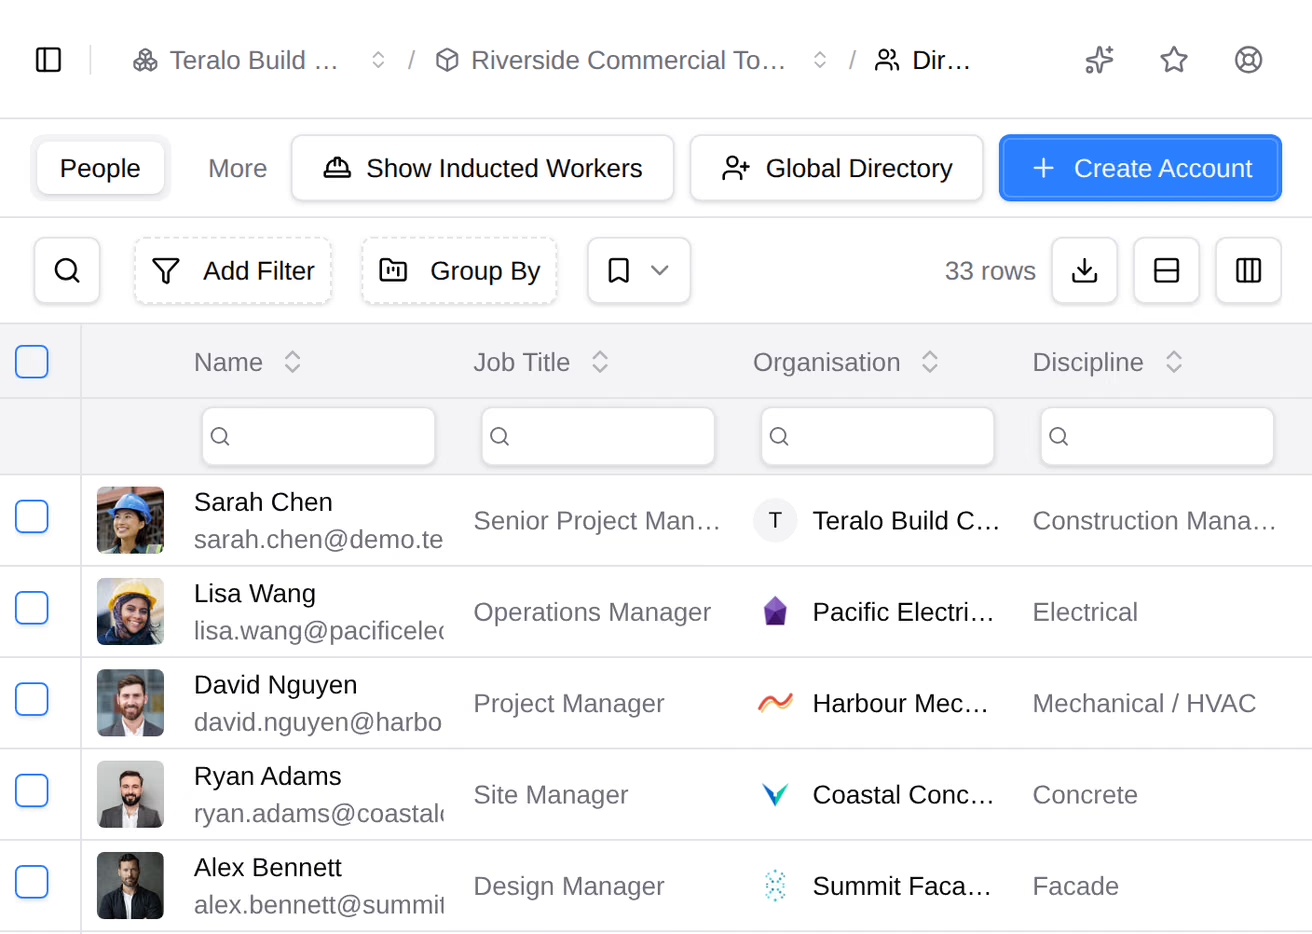
The People tab of a project's Directory, with Global Directory and Create Account above the list of people.
View at full size
The People tab of a project Directory, with Global Directory and Create Account above the list.
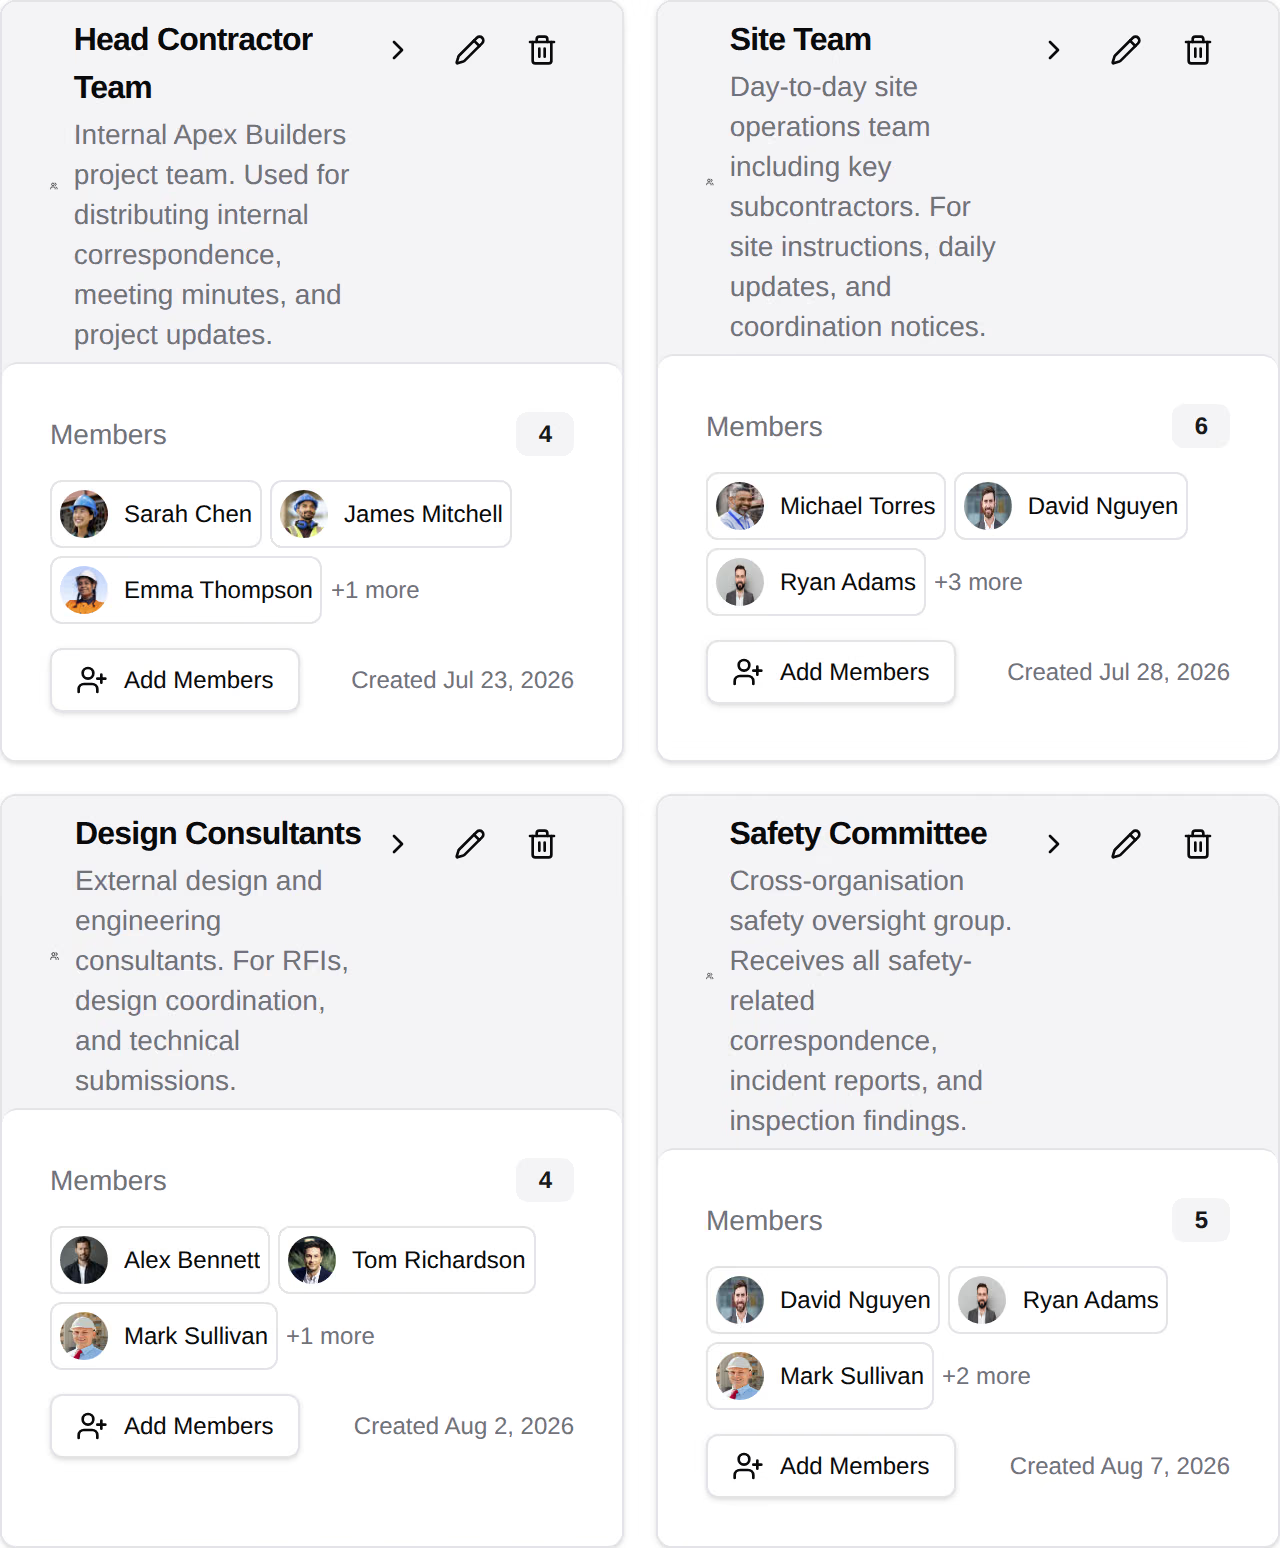
The Distribution Groups tab of a project Directory, a card per group with its purpose and members.
View at full size
Four distribution groups, each with its purpose and its members.

Learn more about the Directory.

Add the other companies

A company appears on the project once someone from it is added. Guests can't add anyone to a project, including their own colleagues. Learn more about inviting people to a project.

Set up the project portal

In the project sidebar, under Project Settings, select Tools, then Public Site.
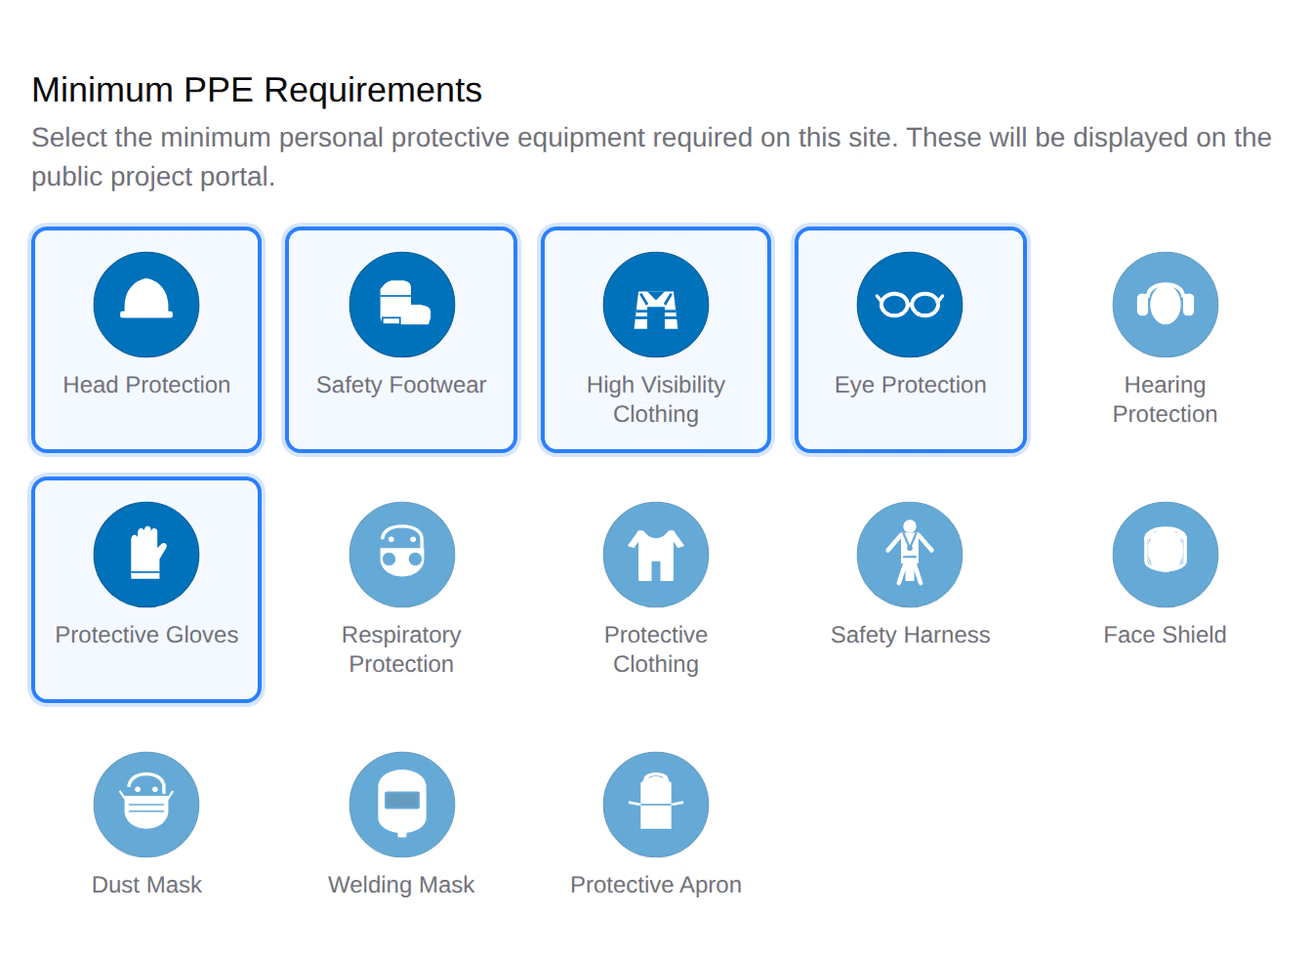
The Minimum PPE tab of a project's Public Site settings, a pictogram tile for each item of protective equipment the portal lists.
View at full size
The Minimum PPE tab of a project's Public Site settings, with the selected signs outlined.
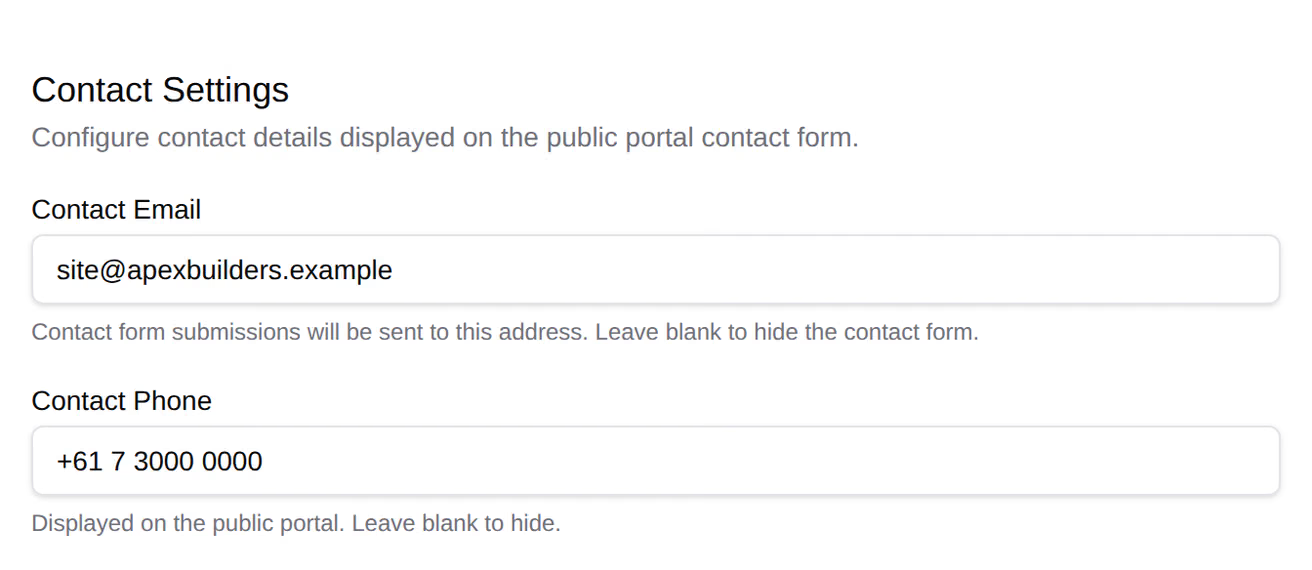
The Contact Settings tab of a project's Public Site settings, with the contact email the portal's contact form sends to and the contact phone it shows.
View at full size
The Contact Settings tab, with the email the portal's contact form sends to and the phone it shows.

A project's portal is live from the day the project is created until it is archived. Learn more about the public portal.

The Project setup pill

The Project setup pill in the sidebar footer tracks 12 items. Everyone from the host organisation sees it on the project's pages. Select it to see the items, and select an item to open the page where you set it.
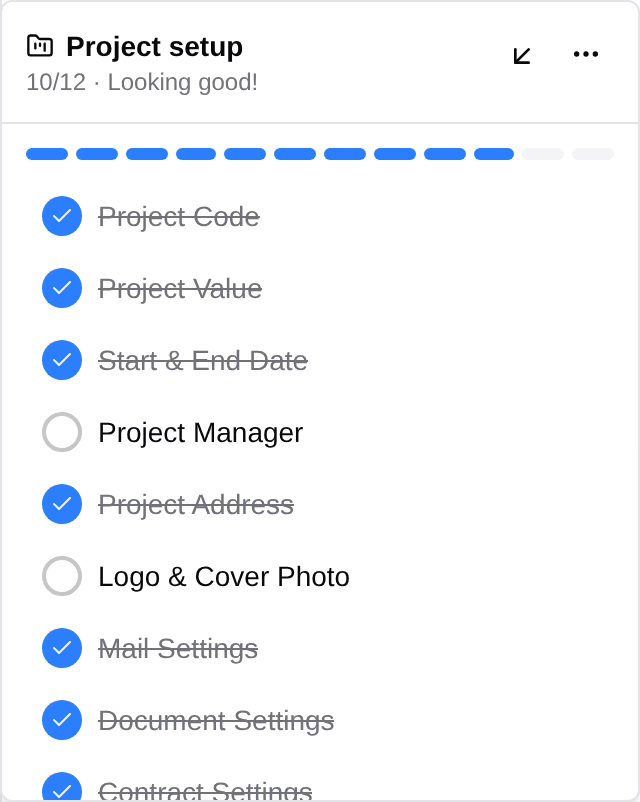
The Project setup checklist open beside the sidebar, with a segmented progress bar above its items and the finished ones ticked and struck through.
View at full size
The Project setup checklist, with 10 of its 12 items done.

Each item is done when:

  • Project Code and Project Value: they are filled in.
  • Start & End Date: both dates are set.
  • Project Manager: someone is chosen.
  • Project Address: the address has a street or a city.
  • Logo & Cover Photo: both are added.
  • Mail Settings, Document Settings, Contract Settings, Budget Codes and Procurement Settings: the project has an entry of its own, or an organisation entry switched on.
  • Project Permission Template: the project or the organisation has a project template other than No Access.

Activate All Templates completes the five tool items wherever the organisation has entries.

The pill disappears when every item is done, and doesn't come back if a setting is removed later. To hide it sooner, select the three dots on the pill, then Mark all as complete. That hides it on this project for everyone, and it can't be shown again.